C&P platen adjustment
I’ve read a lot of differing opinions regarding whether or not to adjust one’s platen and can understand both sides.
That said, after my long road to restoring my old style C&P, I’d really like to adjust it once. I’d feel good about setting it to a home base position and knowing it’s at least close to level.
My first few prints have definitely indicated an uneven platen. Although I’m a beginner, I do understand the packing process etc, and still think I can achieve a better starting point.
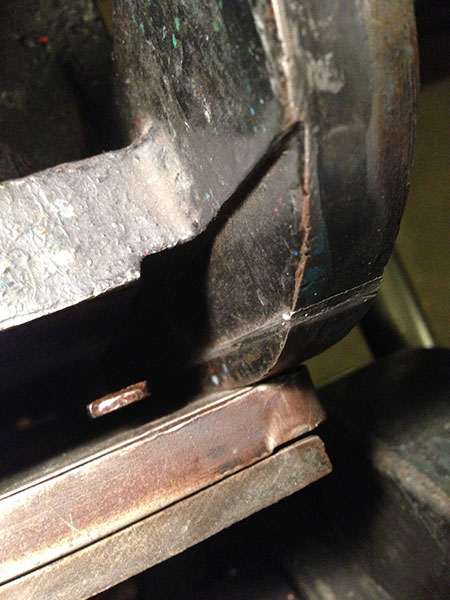
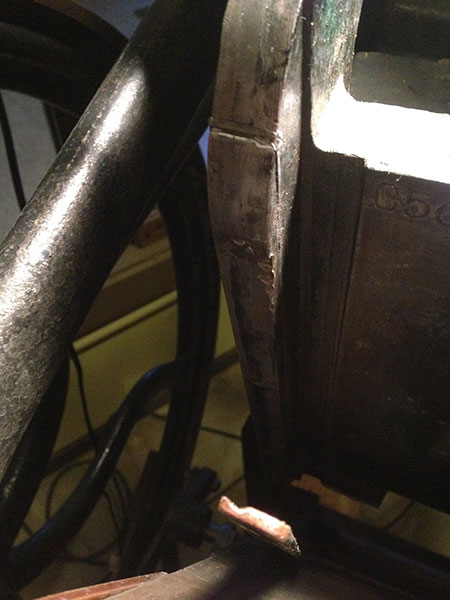
The first thing I notice is that the contact bottoms out on the right side rail while the left still has a gap (approx .005 shim).
See photos.
Is the platen supposed to make contact with the rails?
Should I back the right side off…or bring the left side in?
I’d appreciate any opinions on the matter.
I’m aware of Perennial’s gauge and the method of locking up “M”s in each corner. Totally willing to try both, but still I’d like to adjust if possible.
Thanks very much.
David
IMG_2313.jpg

IMG_2314.jpg
IMG_2315.jpg
I’m no expert,don’t you think you should measure from the platten to the bed as the roller rails could be worn.
@jerry1075: Yes definitely, but my first question would be if the platen should actually meet the rail.
Then I would adjust from the measurement of platen to bed.
The critical dimension is the distance from the bed to the platen, since the paper is pressed on the forme which sits on the bed.
At full impression, the platen should be at type-high plus packing & tympan (~.040” depending on who you ask).
So, even if the rails are at .918” (most have wear) the platen would not touch the rails.
@AnonyMouse: Oh I see. The fact that the platen meets the rail is a moot point if there’s nothing locked up on the bed. Oh boy, I feel kind of dumb for overlooking that!
Thanks.
Your photographs clearly show that your rails have received attention. A repair has been accomplished. The rail to platen touch observation is note worthy but AnonyMouse provides sound wisdom. You will not regret the purchase of the gauge from John Falstrom. Once the platen is set up you won’t question it again as the source of the many variables that will affect your desired outcome. I hope the platen no longer touches the rail following adjustment.
Tom
www.tandtpressrestoration.com
You can make this task as fiddely as you want, however it doesn’t have to be. My suggestions are as follows:
Firstly assure the press is firm and level on the floor, slide a feeler under each foot to make sure they are all firm. I would start with removing each adjusting bolt one at a time and mark the head on each bolt relative to where the threads start on the bolts with a felt pen. Turn each bolt back in and count the number of turns until each bolt just kisses the platen. With all the bolts and locking nuts replaced turn the adjusting bolts in an additional 1/8 turn and assure the felt marks are all in the same location. With a dab of rubber cement attach four beer coasters in each corner of platen, lockup four characters preferred 1/4” dots in each corner of a chase, you will not need any ink for this. Bring the platen and bed together by hand slowly first turn off impression second turn on impression. Inspect the depth of impression in the beerboard all four quadrants should be the same. If no impression showing unlock the locking nuts and turn the adjusting bolts all in an equal distance keeping the felt marks in the same relative positions. Repeat the process turning the press by hand slowly until there is equal visible impression in each beerboard. Secure the locking nuts and recheck, if all four quardents are equal secure the nuts and that should be good another 100. ps assure the bed is clean scrape the bed with a sharp steel rule (perforating rule) to assure it is free of any debris. Your eye is the best gage
Thanks everybody.
pica12point, I’m going to give it a shot. Thank you.