Uneven Impression on a Kelsey 6x10
Hi all,
I’ve had my Kelsey 6x10 Model X for about eight or so months now, and really enjoy it. For the most part, I’m able to get good work out of it without trouble. Recently I accepted an outside designer’s job of 250 save the dates on Crane Lettra 110#. I’m having trouble getting an even impression out of the design.
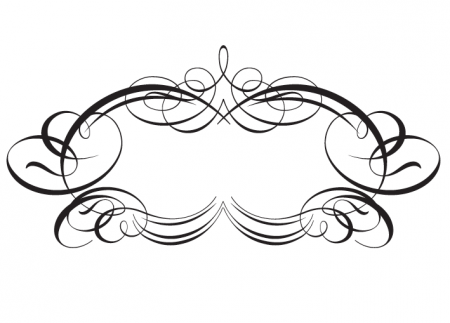
The design is composed of a text layer and a blind deboss layer of some swirls. It’s the blind deboss that I’m struggling with. (See image.) I noticed that my platen had become uneven recently, so when I started this job I took the time to get it aligned evenly. (I don’t have the rollers on because this doesn’t require ink.) When I finished getting the platen even, I ran a card through the press and it looked great. I ran the next card, and it was suddenly off.
The impression, which had looked good and even just one card previously, was now barely visible. I checked that my bolts were all still tight, and they were. I’ve played around with it, but every time I run a card through the press, I get various levels of impression—mostly uneven or faint, but then a few good ones thrown in just to confuse me.
Any idea what could be going on? It’s perhaps obvious and after hours of looking at it I can’t spot it. I’ve never had this trouble before though, and the fact that the first card I ran after leveling the platen looked so great and everything after it so poor has me stumped.
Thanks so much!
Ashley
PS
I should note that I am not trying to get a deep impression here. My press doesn’t like or do deep impression, and I don’t push it to do so. I mean that I get some impression in a spot (top or bottom) and then nothing in the opposite area, which to me would indicate that my platen is uneven, but like I said…
Screen shot 2013-04-24 at 8.03.18 PM.png
The “blind deboss” by definition is deep impression and depending on the size of the swirl image you are probably putting too much strain on the press and possibly something has bent or broken in the impression mechanism, as indicated by the variability. I assume you are closing the press completely for each sheet — not just pushing down somewhat on the handle, but taking it to the point that the handle locks on impression. Check the pins or rods that connect the handle and toggle links to the platen — if bent and rotating slightly each time they will cause your problem.
Bob
Hi Bob,
Thanks for your quick response. I appreciate it.
RE: closing the press completely for each sheet, pressing down until the handle locks: No, I’m not doing this. Pushing the handle down completely to the point of locking has put a lot of pressure on the press, and I found that I could get a great result without having to strain the press by doing this. I push the handle down just to this point without locking it, and it’s worked for me up until now.
Funny that you mention the handle though. I had forgotten about this, but when I bought the press the pin that holds the handle was broken. It had sheered off in two. The previous owner replaced it with a makeshift pin and nut from the hardware store, and the press has been going ever since. The handle does have the slightest amount of give in it every since the original pin broke (when pulling the handle to close the press, the handle moves a touch before the platen moves), but up until now it hasn’t adversely affected anything, for me or the previous owner. Everything else on the press is in good working order. Perhaps this is my culprit?
It sounds like you need to back the impression screws off of the platen until you can get the press to completely close, and then re-set your impression from that point. The uneven pressure sounds like it is being caused by your inability to replicate the amount of impression from sheet to sheet.
Paul
Ashley and possibly others, encountering similar problems,>>on the basis that occasionaly “one cant see the wood for the trees” Including myself!!! many times? somebody comes along with an unfettered approach, with an observation, that is possibly so simple as to have been overlooked by the one who is struggling!!>>>Follows one such:- For Example, is the Block, Plate, or whatever of UNIFORM accuracy over all the image area? and how can you tell or check anyway? A long time ago virtually every compositor had their own TYPE HIGH gauge for go or no go, 50% home made, 50% via graphic suppliers,>>>These were generally only of short reach, (throat depth) construction!!!>>>If a large Block, Plate etc had to be identified as type high all over, usually in one corner of the comp room stood the sophisticated type high gauge, Cornerstone, Hawthorne Baker, F.A.G. etc, equipped with sprung loaded dial gauge, calibrated in one thousandth of an inch increments.!!!>>>Of course (and unfortunately) except in a very few cases (perhaps) new devotees do not have this luxury, sadly.>>>Now in view of the myriad of different mounting methods and the array of different image mediums, some means to establish overall type high would seem to be a boon?>>>A few possible suggestions follow from HIGH TECH through to simple, D.I.Y. (in the absence of the real McKoy or access To) Engineers Magnetic clock gauge, Magnet(ed) on to your, steel/iron surface plate, or lock up stone, with the horizontal leg/arm positioned over any point of the image and the clock gauge reading TYPE HIGH or otherwise???>>>Talk to one of your indigenous engineering Buddies, Masterclass will take all of 5 (five) and there,s also a very good chance,>> that if you present the aforementioned Buddie with the concept of impression, weight, clearance, thickness of stock, (especially with the modern FAD of producing BRAILLE like appearance, in mind)???You may just get better Engineering Based results.>>>If all of the previous is not an option, make your own deep reach/deep*throat*type high gauge. THUS (yes I did it a long time ago) take 2 pieces of of aluminium girder furniture 30/36 ems long, one spacer 10 ems long which can be packed to exactly type high, clamp all 3 and drill through the webs of the ali and the spacer with 1/8 or 3/16 drill, with spacer at one end, bolt together with 2 suitable bolts, before bolting up finally space with 2/3 thickness,s of plastic parcel type tape.>>>I.E. Type High plus 2/3 thickness,s WHY?>>2/3 thickness,s around one leg, at the business end of your type high gauge, A, to give clearance over your image surface, at deep reach and B, for replacement whenever needed.>>>USE!!!Slide your type high gauge to any suspect part of the image, it will either prove HIGH and no clearance, against the plastic foot OR daylight gap at eye-level, ***Linda Sweetheart Catergoricaly None Intended And Hopefully none Taken???
Ashley and possibly others, encountering similar problems,>>on the basis that occasionaly “one cant see the wood for the trees” Including myself!!! many times? somebody comes along with an unfettered approach, with an observation, that is possibly so simple as to have been overlooked by the one who is struggling!!>>>Follows one such:- For Example, is the Block, Plate, or whatever of UNIFORM accuracy over all the image area? and how can you tell or check anyway? A long time ago virtually every compositor had their own TYPE HIGH gauge for go or no go, 50% home made, 50% via graphic suppliers,>>>These were generally only of short reach, (throat depth) construction!!!>>>If a large Block, Plate etc had to be identified as type high all over, usually in one corner of the comp room stood the sophisticated type high gauge, Cornerstone, Hawthorne Baker, F.A.G. etc, equipped with sprung loaded dial gauge, calibrated in one thousandth of an inch increments.!!!>>>Of course (and unfortunately) except in a very few cases (perhaps) new devotees do not have this luxury, sadly.>>>Now in view of the myriad of different mounting methods and the array of different image mediums, some means to establish overall type high would seem to be a boon?>>>A few possible suggestions follow from HIGH TECH through to simple, D.I.Y. (in the absence of the real McKoy or access To) Engineers Magnetic clock gauge, Magnet(ed) on to your, steel/iron surface plate, or lock up stone, with the horizontal leg/arm positioned over any point of the image and the clock gauge reading TYPE HIGH or otherwise???>>>Talk to one of your indigenous engineering Buddies, Masterclass will take all of 5 (five) and there,s also a very good chance,>> that if you present the aforementioned Buddie with the concept of impression, weight, clearance, thickness of stock, (especially with the modern FAD of producing BRAILLE like appearance, in mind)???You may just get better Engineering Based results.>>>If all of the previous is not an option, make your own deep reach/deep*throat*type high gauge. THUS (yes I did it a long time ago) take 2 pieces of of aluminium girder furniture 30/36 ems long, one spacer 10 ems long which can be packed to exactly type high, clamp all 3 and drill through the webs of the ali and the spacer with 1/8 or 3/16 drill, with spacer at one end, bolt together with 2 suitable bolts, before bolting up finally space with 2/3 thickness,s of plastic parcel type tape.>>>I.E. Type High plus 2/3 thickness,s WHY?>>2/3 thickness,s around one leg, at the business end of your type high gauge, A, to give clearance over your image surface, at deep reach and B, for replacement whenever needed.>>>USE!!!Slide your type high gauge to any suspect part of the image, it will either prove HIGH and no clearance, against the plastic foot OR daylight gap at eye-level, ***Linda Sweetheart Catergoricaly None Intended And Hopefully none Taken???
Hi Paul and Mick,
Thank you both for the information and suggestions. Paul, I’ll try that again and report back. Mick, I’ll pass my husband (a civil engineer) the information you provided about type-high gauges, which I am aware of but do not have. He may enjoy the challenge of a DIY project.
Best,
Ashley