Printing two colours/ making your own photopolymer plates
Hello everyone,
I have a question if anybody would like to give me some advice.
I’m not new to letterpress printing but I’m not an expert either
I just purchased a UV exposure unit to make my own photopolymer plates. I’m going to purchase my film from a company called lithofilm who are going to turn my design into a negative film with I can then use to make my photopolymer plate.
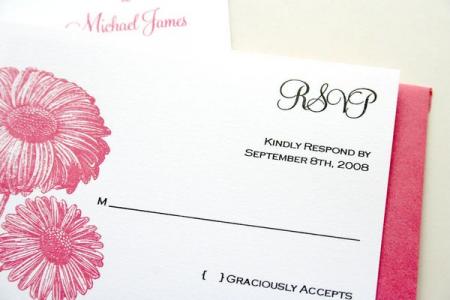
I will be printing invitations and many of my designs have two colours. My question is if I have a design with two colours but they are not touching, can I have them put on the same film, turn the entire design into one photopolymer plate and then using a scissors (because the photopolymer won’t be metal backed) cut the two different colours apart?
By the way, the two colours are not weaving in and out of each other in the design, they are clearly separated and would be easy to cut from each other.
I wondering if I can do this because I would save money by requiring less film and less photopolymer.
I’ve attached an image at the bottom to explain what I mean.
Any suggestions would be greatly appreciated.
Best wishes,
Rebecca
daisy-invite2.jpg
Rebecca
Yes. This is a common practice with polyester backed plates. Lay down the plate, make sure it is in register, cut out the second color. When the first color is printed, put the cut out piece back in place and pull the first plate.
A problem is that your second plate might be a bit wonky since it can twist out of align a bit during application or during the subsequent run. Not sure it is worth the possible aggravation, but if you are trying to save pennies I suppose it does not matter.
Gerald
http://Bielerpress.blogspot.com
As Gerald described, it will work and should be no issue with the image you’ve shown.
Make certain the negatives are right reading emulsion up. This is the opposite of what is required for making litho plates. I thought I’d add that to make certain to let the film output operators know.
Jhenry
Hey rebecca- check out this video:
http://www.youtube.com/watch?v=Fp3YeGYLPZg
By the way, you’re a step ahead already by being willing to process your own plates, but be sure to have the right kind of brush, as well as a nice warm bath of water and a way to stick your plate down.
The folks at boxcar couldn’t be more helpful and have a video series on the web:
https://www.boxcarpress.com/community/letterpress-training-video.html
For maybe a few other questions you might end up with like mixing ink or other stuff, if it’s there.
Yes,
I’ve been doing it this way for a couple of years because I’m terribly cheap about photopolymer which is already so expensive for something you can typically only use once.
A little trick - if you’re going to do it this way, sometimes lineup can be hard since you can’t really rely on crop marks. Here is how I do it. I’ll print the first color. Put a pice of acetate over a scrap print (or just use a scrap print) and use double stick tape to lightly tape the plate face to the print (looking through the clear plate to line it up). Remove the backing, load the paper with the plate attached into the gauge pins and turn the fly wheel (it’s the same with a cylinder press except you are lining up in the gripper pins and turning the impression cylinder) and then the plate will stick to the base in usually the perfect spot. If it’s off it’s only a small amount that is easily adjusted for.
In the case of a cylinder press it’s even easier because it pulls away from the acetate layer very neatly. On a C&P it will take the paper with it and you’ll have to peel that off once it’s on the base so take the rollers off when you line up(which you would do anyway) to prevent the paper from getting sucked into the rollers.
Wow! Thank you everyone for all of your responses, very helpful.
Jhenry I did not know about having the negatives right reading emulsion up and the man who is making my film wouldn’t have known either as he told me he doesn’t have much knowledge of letterpress. That just saved me ordering something unusable, thank you.
The boxcar press videos are wonderful, I’ve learned a lot.
HavenPress, I just ordered a good washout brush from polydiam. I’ve never done a washout before so I think it will be trial and error. Do you have any very specific tips because I know the basic process but not much about washing out the plate. Should the water be just luke warm?
Panthera Press thank you for the tip on how to line up. I have never done that either, much appreciated.
Thank you everyone again for your help.
Rebeca
The water should be whatever temp the datasheet for your specific photopolymer recommends.
I use a lot of 94FL plates (boxcar vends them).
Here is the datasheet from their site:
https://www.boxcarpress.com/photopolymer-supplies/images/94fl-datasheet-...
For example, the Jet Waterwash Series Photopolymer with a Polyester Base in .037” that boxcar vends, in the 62D shore hardness, has a recommended bath temp of < 23°C/ 72°F.
It also says it should take between 4-5 minutes to wash the plate down to the base with proper exposure and a soft brush and consistent agitation within a bath of that temp.
So, basically, get ready to move your hand in constant soft circles for 5 minutes or less, alternating those circles and alternating the brush between hands.
Tips or questions? I recommend locating and watching a copy of “The Karate Kid”.
http://www.youtube.com/watch?v=__qOY9hcm64
Hi Haven Press,
Thank you for your advice. The video has really helped me to get an idea of the technique!
I ordered my plates from Polydiam. I will ask them for advice about water temperatures.
Thank you for taking the time to help.
Rebecca
Hey, happy to help. You should be able to locate a copy of “The Karate Kid” pretty easily- I think Itunes has it and it might even be on netflix.
Happy waxing!