And so it begins…
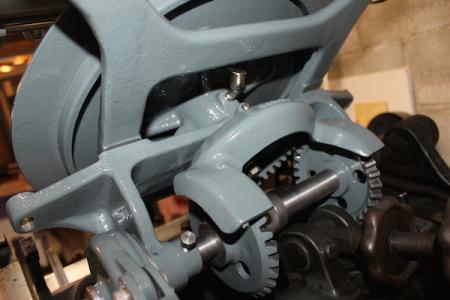
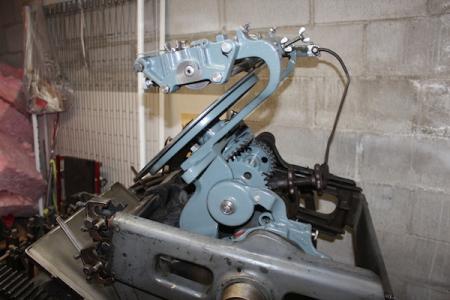
At the beginning of the summer, I started to dismantle the ink fountain and ink disk assembly on my C&P 10x15 Craftsman. Everything was filthy with dirt, grease and ink, and needed a good cleaning. I finally finished repainting those parts tonight, and put them back on the press so that I’m not tripping over them on the floor. I’m quite please with the results.
It took me most of the summer to get to this point, thought I barely touched the press for most of July and August. I’m still worried about how long it will take to give the entire press the same treatment.
Briar Press is a bit unpredictable about what order images appear in, but it would be clear that there is one before photo, and three after photos.
IMG_7599.JPG
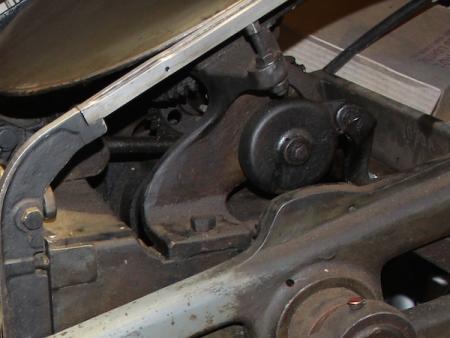
july-02-2014-before.jpg
IMG_7585.JPG
IMG_7586.JPG
Nice job!
Thats a beautiful job. So well done. But one small thing. Splash some oil around. It all seems a bit dry and my training from the 60’s is saying “oil”! But look. Its a wnderful job youve done. Never seen a C&P in that clean a condition!
It is bone dry right now. I didn’t want to get oil everywhere with the paint still curing. It will definitely receive a good oiling before I put it into use.
The only thing clean on this press is the inking apparatus. The rest of it is black with grime. There is still a lot of work to do, but I might put off further restoration work until next summer, the impending freezing weather isn’t very conducive to that kind of work.
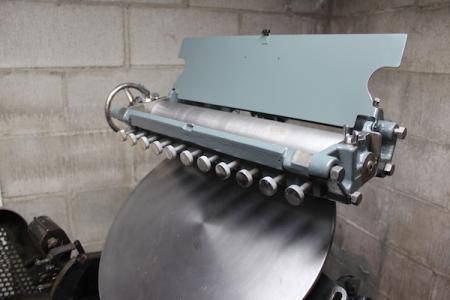
Curious about the ink fountain since it has knobs to adjust the flow across the roller, similar to a heidelberg. Since the ink disk rotates can you actually control the ink distribution across the form?
Daniel,
The rotation of the ink disk is variable, from roughly 10° per cycle, down to 0° per cycle, by loosening a wing nut and turning a stroke adjustment screw.
IMG_7589.JPG