Slurring on one side, inking issues
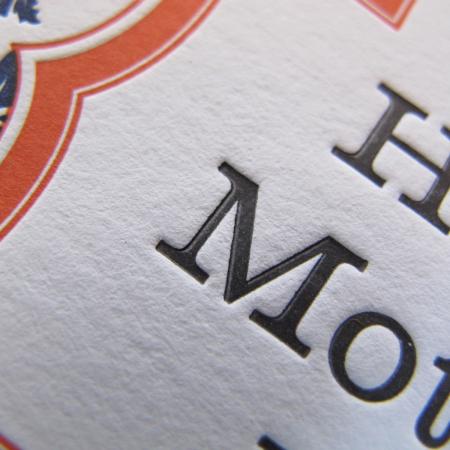
I have been having a heck of a time getting my c&p “dialed in” to print as well as my pearl did. I have attached an image of some text that has what I would call slurring in one side. No matter how little ink I put on this continues to occur. I have taped the rails but can’t get consistent inking. In addition the chase bed is a little dished, but I don’t think that’s what’s causing this problem.
The roller cores are keyed to the trucks and they turn smoothly over the rails. Rollers are less than 6 months old. I tried using roller bearers but that didn’t really help. I feel like I’m jumping all over the place instead of being more methodical in tackling this, so if it were you how would you troubleshoot?
Thanks!
IMG_0541.JPG

IMG_0540.JPG
What type of ink are you using?
Rubber based.
I assume you’ve verified that the roller trucks are the same diameter as the rollers or less than 1/16 inch overall smaller. If there is a significant difference the rollers will skid on the printing surface causing the slurring you’re seeing. Otherwise it’s mysterious, especially if it also occurs with type-high roller bearers at least 2 picas wide and longer than the printing surface in the direction of roller travel.
Bob
What direction are you printing in? Is the slur on the leading edge? Try rotating the image to see if the location of the slur is consistent.
Jonsel-
Usually (but not always) it’s along the bottom, non-leading edge. Though in the above example, it was actually on the left side. As you can see the problem did not occur on the right side.
Do you have a lolly-pop type roller height gauge? Have you checked every roller during all 360 degrees of each roller’s rotation, in the middle and on both sides, to see that the bead of ink on the lolly-pop is the same width in all of the checks?
Another thing you could try is to check and see which is the last roller on your press which comes off the form (the plate) before the impression is made. Then change that roller with one of the other ones. There is a chance that the last roller which comes off the form before the impression is made, is the one which is causing the problem. If the problem roller is not in that position, and even one of your rollers doesn’t have the problem, if the one good roller is positioned in the press to come off the form last, that one roller may very well cover up the problem caused by the other rollers.
Or, you might try switching some rollers end-for-end. Take a roller out of the press and put the end which was on the right, on the left. If you find a combination which works, then leave the rollers in the press that way, or if you take them out, put them back the same way with the same trucks. You probably wouldn’t want this to be a long term fix, but it might get you through in the short term.
Its a bit hard to tell from your pictures - but it looks rather as if you are getting the problem just on type, and just in one direction. I don’t know if you are using type or plates, but if type, then lock-up is OK is it? Your type is not getting pushed over to one side? Then either picking up more ink on the high side or giving more ink squash on that side?
Geoffrey- I do have a lollipop gauge which is what I used to set things originally. With the “dishing” of the chase bed and the extremely uneven rails it was nearly impossible to get a consistent width on the gauge. That was why I decided to try the roller bearer option. I really like the idea of trying end to end and reversing the rollers though….
After doing some more measurements I feel like the rollers are really too big, so I am sending them (along with the trucks) back to the roller manufacturer. He is going to check for consistency with the trucks and verify the round of the trucks. Once I get them back I am going to pull all of the tape off of the rails and start fresh. I will keep you posted.
Circut5- The pictures may be a bit deceiving in that only the type is actually printed on the C&P, the rest was on the Vandercook. I’m pretty sure the lock ups are fine. I’ve been printing for a few years and this is a problem unique to this press - it happens on cuts and plates too.
Hi again!
When you say that the chase bed is dished, do you mean that the flat machined cast iron surface behind the chase is shaped like a dinner plate, i.e. it is lower in the middle than it is on the edges when you put a straightedge across it? How much lower is it? For instance, 20 lb bond paper is probably about 3 to 4 thousandths of an inch thick. How many pieces of bond paper can you slide under the straight edge in the middle of the bed?
The amount of “dishing” present, may bring up other possibilities for curing the problem. Perhaps building up the low places in the bed with layers of thin paper or a more durable material, like the contour lines on a topographical map, would be a possibility.
Hi Geoffrey- that’s exactly what I mean! If I put the straightedge across I can see light through the middle. Not much of an issue when printing with a base, but I print a lot of handset type. I will check for the number of pieces of bond I can stick there when I am back in my shop. Meanwhile I looked again at the trucks/rollers and something there seemed out of round, so I shipped them out for better machining too. I’ve thought about building up the chase bed with cut packing paper and super 77 as a sort of weird makeready. Do you think that would work?
Hi r90sgirl - yes I think that would work. Remember that the Super 77 adhesive layer on the paper will probably have a thickness as well, which you will need to take into account in the buildup. It sounds like you will be placing a series of concentric circles, more or less, in the middle of the chase bed to build it up so that the entire bed is even. I think I would start with the biggest circle of paper, and place successively smaller ones on top of it, rather than starting with smallest one and placing successively bigger ones on top. If you did it the first way, you probably could lightly sand the edges of the circles of paper to get a more even gradation of thickness (taking care not to sand the chase bed of course).
Thinking about your current situation when you print type, you lock it up on a flat surface, and then when you put it in the press and start printing, the type in the middle of the form pushes down until it rests on the press bed, which is low in the middle. You can of course compensate for the variation in impression by doing a conventional makeready under the tympan on the platen. However, a makeready on the platen would not correct the situation of the type being low in the middle, and that in all likelihood is what is causing the uneven inking and the reason you can’t get your rollers set correctly. So, it certainly sounds like building up the bed so that it is even, is the answer.
Once you get the buildup done, you might want to put a piece of paper or mylar over the entire bed including the built up area. This would be to protect the build up you did. After many jobs, that cover sheet may become damaged, but hopefully the build up underneath it won’t be damaged. So, all you would have to do is change the cover sheet, and you would be good to go again.
Hope it works for you! Regards, Geoff
Causes:
Ink too thin
Impression too much
Roller are not set to the correct height
After the above are checked then the trucks are slipping and can be fixed by a little powdered rosin on the trucks.
Causes:
Ink too thin
Impression too much
Roller are not set to the correct height
After the above are checked then the trucks are slipping and can be fixed by a little powdered rosin on the trucks.