Poco Hacker No. 0 cylinder position
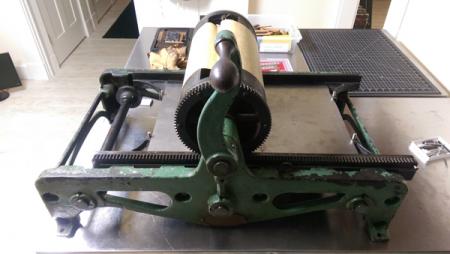
hi all, I have recently acquired a Poco No. 0 through Briarpress and I’m very happy with my purchase. I give her a good cleaning and oiling. I’m very happy with the press’s performance and resulting prints, and I’m still awaiting required parts like a rubber blanket and correctly sized tympan.
After some tinkering I’ve come across something that seems rather odd to me: The cylinder/bed are not centered when the handle is in its “up” position, which results in a 2” shorter possible print length.
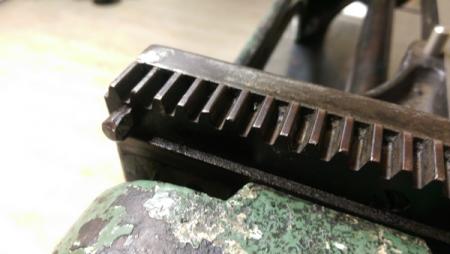
I’m pretty certain that this is not normal, however, the easiest way to remedy this, would be taking the tapered pins out of the geared rail, and reposition the cylinder. Unfortunately, those pins are beaten to death, and it seems like they are stuck for eternity…
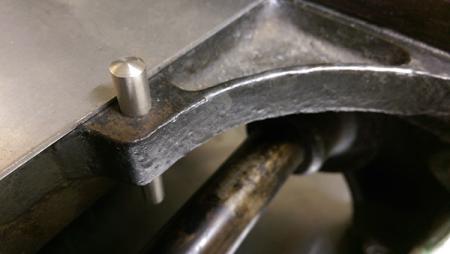
I have replacements at hand, but before I go ahead driving them out, I’d a.) like to hear from other Poco #0 users if the positioning is indeed off, and b.) if someone could confirm that these pins indeed meant to come out, like the one’s at the end of the bed…
Please inspect the attached pictures and let me know what you think!
thanks in advance & thank you for a great community
Markus
2015-02-09-20.46.46.jpg

2015-02-09-20.47.02.jpg
2015-02-09-20.47.55-1.jpg
2015-02-09-20.50.03.jpg
2015-02-09-20.49.41.jpg
You are correct- the cylinder does seem to be engaged in the wrong relationship to the bed. Does it appear you could loosen a lock nut or two, remove the crank handle and drive the central axle out of the cylinder assembly? I think this would be the easiest solution for realignment if you are unable to remove the pins at one end of the geared racks on the bed.
With stuck parts, some PB Blaster penetrating oil can be a big help.
DGM
Just found this Poco blog but don’t see any clear shots of a Poco for comparison:
http://pocoproofpress.blogspot.com/
There is this page at Vanderblog
http://www.vandercookpress.info/poco.html
A quick look at my Poco 0 looks to me like the bed stops are the pins, so you should be able to roll the bed from one stop to the other. The handle position will not be centered when the bed is centered, but that should not inhibit use of the press.
I would not attempt to remove the crank handle and realign it — it is pinned to the shaft, which is probably pinned to the cylinder. The cylinder gear is held on with 6 screws at 60 degree intervals, so if the handle, as it appears in your photo, is 60 degrees out of phase you could just remove those 6 screws, rotate the handle to vertical, center the bed, and screw the gear back on. But I think it would be better to reposition the bed if the misalignment is different from 60 degrees.
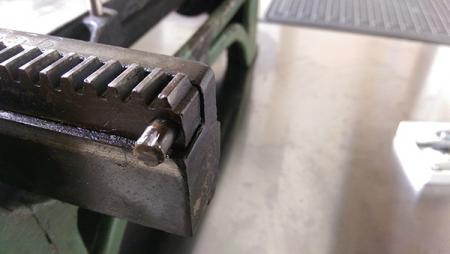
I believe the pins are tapered, however, so perhaps a good soak with PB Blaster (from an auto parts store) followed by careful tapping on the inside end with a pin punch smaller than the pin, to avoid if possible any mushrooming of that smaller end, will make it possible to remove one or the other stop pin (the ones on the rack gear side of the bed in your 3rd and 4th photos). If they are tapered (the inside end looks smaller than the outside) as soon as they move they should slide out easily. Good luck!
Bob
Everything on this little machine is held in place by tapered pins it seems, and I assumed the two pins on the cylinder pinion gear were the same…
Wrong – sometimes it’s easier than you think. I dremel’d the slot open in the “safety” screw, removed all six screws, and the pinion gear came off easily. Then I was able to slide the bed into a centered position, and now she’s stopping correctly at either end with the cylinder covering the whole bed. bingo!
Thank you all for your input… I’ll get a hold of some PB and will try to replace the busted stopping pins. It simply drives me nuts to look at them!
2015-02-10-13.51.14.jpg
2015-02-10-13.45.43.jpg
2015-02-10-14.02.03.jpg
Smart solution! I never would have thought of that!
Congrats! It was the simple solution after all. Have fun printing. I am working on putting a tympan and frisket on a 10x15 C&P chase so I can print editions with registration on my Poco. I just need to replace the full-bed-size galley I lost in my move. :-(
Bob
thank you both!
Mine didn’t have a galley sheet, so I just bought a 0.05” thick stainless steel sheet…
Good luck with the frisket – sounds like a fun project! I’ll stick with registration holes & pins for the time being.
See https://sites.google.com/site/pocoproofpress/ for lots of pictures.
Preston