How to attach tympan paper to Morproof press
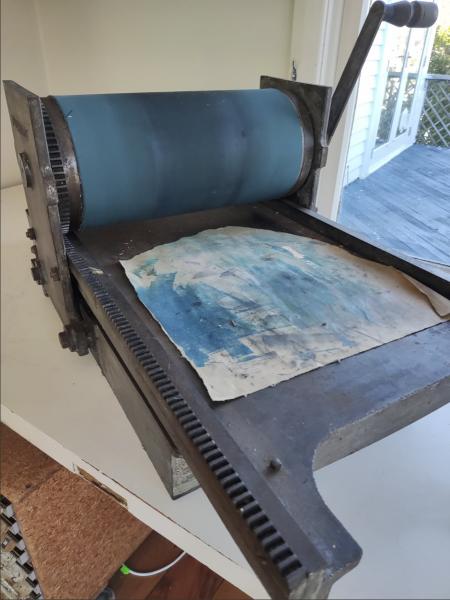
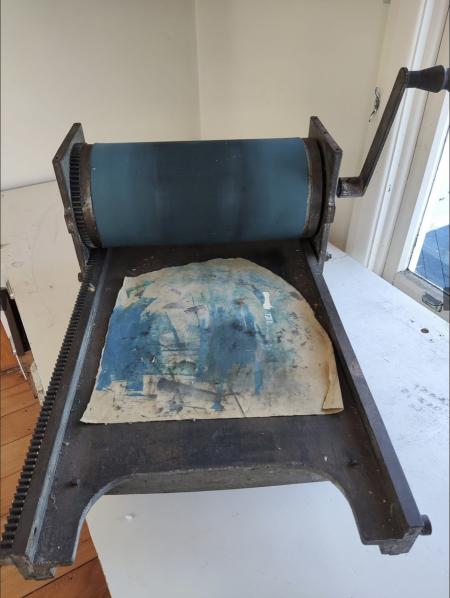
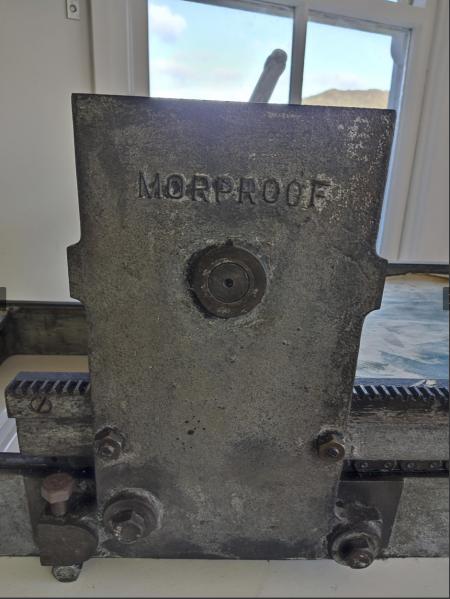
I have acquired a Morproof proofing press. I cannot find any info about it except that the government printer in New Zealand bought two of them in 1950.
I cannot see how tympan paper is attached to the impression cylinder and I hope the arrangement is common to other presses and readers may be able to share how tympan paper is attached to their similar presses.
At present, the impression cylinder is “dressed” in a piece of offset blanket, the ends of which are stitched together with thread!
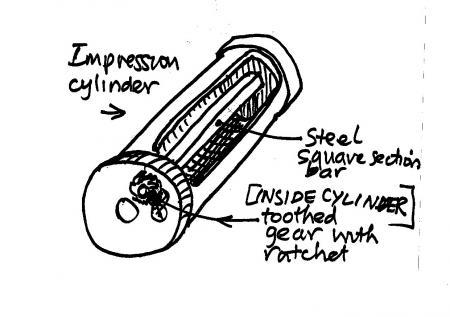
The impression cylinder is hollow and the steel forming the cylinder is about 1/4” (6mm) thick. At one point in the cylinder, there is a void through which you can see a rotating square-section piece of steel running the length of the cylinder from one end to the other. At one end of the piece of steel is a toothed wheel and a ratchet arrangement. So, I guess one end of the tympan paper is wound around the length of square-section steel and the steel is tightened and held in place with the ratchet arrangement.
My problem is that I cannot see how the other end of the tympan paper is secured. There is no other mechanism to do this and no empty screw holes or attachment devices.
So, does anyone have any idea how to secure the end of the tympan paper that is not wrapped around the rotating square section steel piece?
I have attached some photos and a diagram which may help. When the press arrives, I will attach photos of the void in the cylinder.
Roger
Morpress1.jpg
Morpress2.jpg
Morpress3.jpg
Morpresstympan.jpg
The square bar is definately for wrapping the blanket around. Is it something like starting the wrap of one end of the blanket, then once started, fit the other end in? finally wrapping both ends of the blanket until tension is aquired? The system sounds similar to a heidelberg cylinder. Heidi’s tho, only wrap the back end, with clamps on the front.
Ericm is basically right. Cut off all 4 corners of the tympan at an angle so it has two angled ends sticking out with “tongues” (for lack of a better word). Wrap the tympan around the cylinder, put the two tongues together side-by-side, stick them through the hole in the cylinder, and then start them wrapping around the square bar together. After a turn or so they will tighten onto the bar and then you can complete the tightening with the rachet (the “gear”), and the pawl (which keeps the gear from turning back).
Thank you both for your replies.
I had tried to work out in my mind if one square-section bar could tighten both ends of the tympan paper but my brain could not cope. So, I did a sketch with two paper ends going over the bar, but that cannot work because, once the both ends go over (or under) the bar, you cannot access the ends to tuck them in against the bar.
I gave up at that point and posted here.
I now realise that, if you wind the ends SEPARATELY (not together as is suggested above) on the bar, both ends can be secured on the one bar inside the cylinder.
You would wind one end of the tympan paper around the square-section bar a few times to fix that end in place on the bar and then you would pull the other end tight and wind that end onto the bar by holding that end against one side of the bar and trapping it in place by rotating the bar until that end is jammed on the bar. You would continue winding the bar until the tympan paper is tight all around the cylinder.
Next problem is the pawl assembly does not work securely and there may be something missing. Please see attached diagram. Possibly, the pawl should be longer and there should be a spring to hold it against the ratchet teeth and something to easily disengage the pawl when required? I note there is a screw near the pawl axle which presently has no purpose.
What do I need to do to make the pawl and ratchet assembly work securely?
Morproofpawlandratchet.jpg
Often, the ratchet gear gets worn in one area, to the point that your “pawl” won’t stay engaged. Look for worn or rounded teeth. If so, can you remove the ratchet gear and reshape the teeth with a file?
Thank you, ericm
My problem is not so much with the engagement of the pawl with the ratchet but with the absence of something to keep the pawl against the ratchet. I think a spring or something should be fixed to the “empty” screw in my second diagram to keep the pawl against the ratchet.
Any ideas?
The pawl is manually held in place as you wind the tympan bar, and the tension of the packing materials will hold it in position once tension is achieved
John Henry
Cedar Creek Press
Here’s a photo of ratchet and pawl assembly. All works well since I tightened pawl screw. But what is purpose of the screw adjacent to the pawl screw?
I think I might use it to hold a soft rubber disc to maintain pressure on the pawl.
Any other ideas?
Pawlassemblysmall.jpg
There should be a spring to apply some pressure to the ratchet. Not a lot, just enough to keep it in place. The extra screw is for the spring.
Ratchet_rotation_prevented.jpg
Looks like there’s a lever behind the second screw. Might work like the ratchet lever on a come-along.
Nice diagram, bppayne! But my spare screw is on the other side of the pawl. That’s why I think I need something to push the pawl towards the ratchet teeth
Sharecropper Press: what is a “come-along”?
A come-along is used to secure heavy loads and sometimes as a winch. It has a long cable that is pulled onto a spool that is secured by a ratchet assembly.
5F01812E-280F-4397-B1A3-CD8A665EE05B.jpeg
I would try something easy first. Maybe a piece of die rubber secured with that screw to apply just enough pressure to keep the pawl in place. Have you tried packing the press yet?
something like this, made to correct dimension could be made. The double tab would allow you to flip it on or off, and provide pressure across the width of thw pawl.
Leverlock.jpg
From my experience the taughtness of the packing was sufficient to hold the pawl in place. On my Miehle vertical the tympan sheet was drum tight and the pawl had nothing to keep it in place other than the tension of the tympan sheet.
I guess I would agree with that. If the pawl is not staying in place under tension, I would think the teeth need shaping.
Maybe I’m just looking at casting marks, but if it is a lever it could be held in position by a rocker-type spring. Removing the screw might reveal a broken spring.
lever.jpg
Sorry to mislead you above about putting both ends in together. I thought that’s how I did it on a Poco proof press I had years ago, but I guess not. I’m glad you got it done, anyway.
I do not think that spring detent is original; it would have been a comma-shaped casting. What the the second position held is another matter.
To second frank hemmings above, no ratchet-and-pawl I have seen in printing needed spring retention. The tension of the topsheet (or secondary undersheet for permanent packing on a Heidelberg cylinder) is all that is needed for a pawl to hold the ratchet.
The only variation I’ve seen is whether the reel draw is over or under, and the pawl tells you that.